
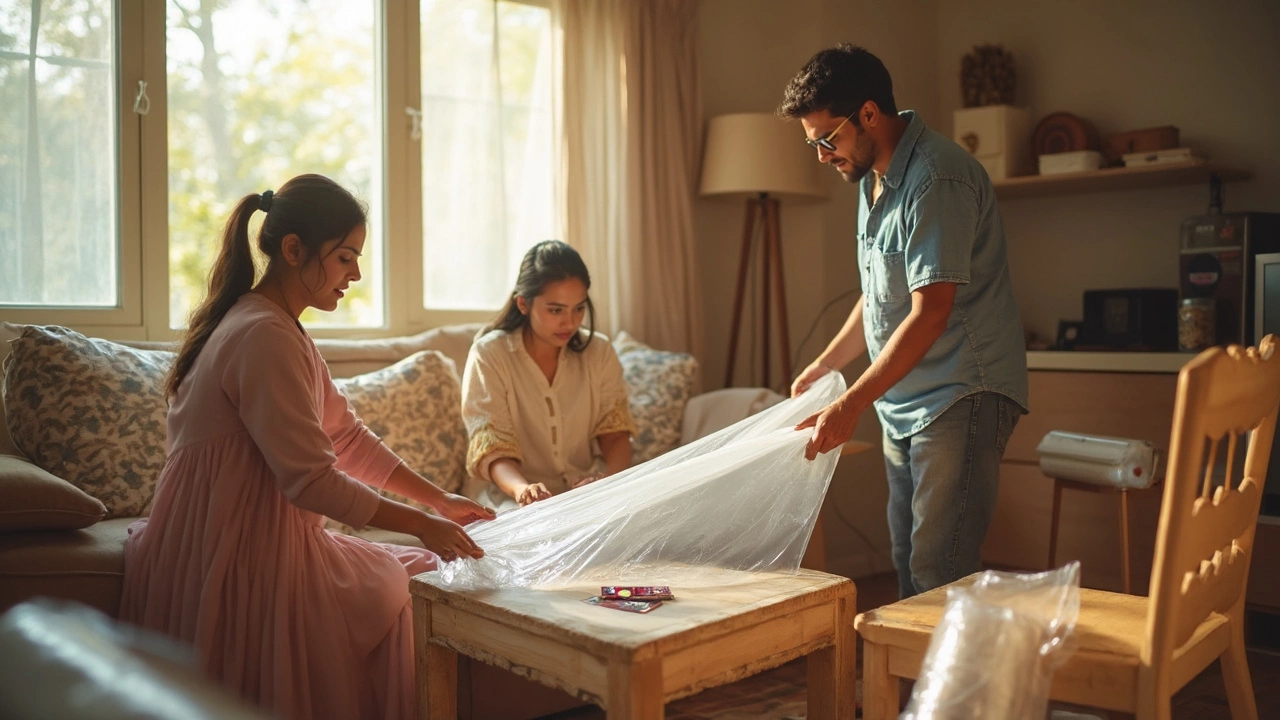
Ever opened your storage unit to find a layer of dust on your favorite couch or a mystery scratch on the dining table? Shrink wrapping your furniture before it goes into storage isn’t just about keeping it clean—it’s about making sure it comes out looking exactly like it did when you put it away.
People sometimes skip shrink wrap because they think it’s complicated or not worth the trouble. Truth is, it’s easier (and more affordable) than you might think, especially if you want your stuff protected from dust, bugs, or even that weird musty smell that loves to set up camp in storage spaces. If you’re working with padded storage blankets now, shrink wrap is like the secret ingredient that keeps everything in place.
Get ready for clear instructions, real-world tips, and a few things you should absolutely avoid. Grab your roll of shrink wrap and let’s get this furniture ready for its time on the sidelines—and bring it back looking like new.
- Why Shrink Wrap Matters
- Gather Your Supplies
- Step-by-Step: Wrapping Furniture
- Tips for Different Furniture Types
- Things to Avoid and Extra Hacks
Why Shrink Wrap Matters
Ever left a piece of furniture in a garage or storage unit, only to come back and find it totally changed? Shrink wrapping is your best defense against all sorts of surprises. It's like putting a protective shield over your belongings. It's not just about keeping things dust-free—although you'll definitely avoid digging dirt out of cracks and crevices later.
Furniture faces risks in storage, even in climate-controlled spaces. Moisture sneaks in, dust settles everywhere, and pests sometimes find tiny nooks to explore. According to a 2023 survey from the Self Storage Association, over 37% of storage renters reported furniture getting dirty or scratched after just six months in storage. That’s a headache you don’t need.
Here’s what shrink wrap specifically prevents:
- Dust and debris: No more worrying about layers of grime on your chairs, sofas, or tables.
- Scratches and dings: The wrap holds everything tight, even if you stack or bump items when moving them in or out.
- Moisture and mold: It blocks most dampness, which is key if you’re dealing with wooden furniture or fabric that molds easily.
- Pests: Rodents and bugs can’t chew through thick plastic, so your furniture stays safe.
- Odor protection: That musty storage smell doesn’t seep in, and your stuff doesn’t come out smelling weird.
For a quick look at how shrink wrap stacks up to other furniture protection methods, check this out:
| Protection Method | Dust | Moisture | Physical Damage | Pest Barrier |
|---|---|---|---|---|
| Shrink Wrap | Excellent | Good | Great | Great |
| Moving Blanket | Good | Poor | Great | Poor |
| Plastic Tarp | Fair | Fair | Fair | Poor |
| Nothing | None | None | None | None |
So, for keeping furniture in good shape long-term, shrink wrapping just makes sense. It’s cheap, easy, and saves you from the hassle of cleaning, fixing, or repainting when it’s time to move your stuff back in.
Gather Your Supplies
Shrink wrapping furniture doesn’t call for a toolbox full of weird gadgets, but you do need a few items to do it right. Here’s what makes the job easy and keeps everything protected.
- Shrink wrap (also called stretch wrap): Go with furniture-grade plastic, at least 18 inches wide. The thicker the better—look for wrap that’s labeled at least 80 gauge for stronger protection.
- Moving blankets or pads: These give a soft layer, so your furniture doesn’t get scratched under the plastic. Quilted moving blankets do a better job than old towels or bed sheets.
- Packing tape or plastic wrap cutter: Tape secures the edges, while a cutter makes unwrapping easier (and safer) later. Never use scissors or knives directly on the furniture.
- Cleaning supplies: You don’t want to wrap in dirt—grab a spray cleaner or dust cloth. If your furniture is going into storage long-term, toss in a few moisture absorber packs or silica gel bags too.
- Furniture sliders or a dolly: Moving heavy pieces is a lot easier and safer with proper gear. Don’t try to drag wrapped furniture across floors; you’ll rip or bunch up the plastic.
Here’s a quick cheat sheet so you know how much shrink wrap and how many moving blankets you might need. These numbers are ballpark estimates:
| Furniture Piece | Average Shrink Wrap Needed | Moving Blankets |
|---|---|---|
| Couch (3-seat) | 60-80 ft | 3-4 |
| Dining Table | 40-50 ft | 2-3 |
| Mattress | 40 ft | 1 |
| Bookshelf | 20-30 ft | 1 |
| Nightstand/Chair | 10-15 ft | 1 |
Most moving companies recommend a roll of shrink wrap per large item, just to be safe. Also, grab more blankets than you think you’ll need—stacking furniture blankets can prevent nasty dents and chips.
Last tip: Don’t buy the thinnest plastic thinking it will save money. Cheap wrap rips and doesn’t actually protect your stuff. Spending a few bucks more pays off big time when you finally go to unwrap everything—no tears, no mess.
Step-by-Step: Wrapping Furniture
Alright, let’s get into the nitty-gritty. Shrink wrap isn’t rocket science, but if you don’t follow the right steps, you can end up trapping moisture, tearing the wrap, or even scratching your stuff by accident. Here’s the process that works every time:
- Clean and Dry Everything First
Don’t skip this part. Crumbs or dust stuck under the wrap can scratch finishes, and any moisture will get locked in and could cause mold. Wipe down surfaces and let them air out before you start wrapping. - Disassemble If You Can
Tables with removable legs, beds, or bookshelves? Take them apart. Smaller pieces are easier to wrap, safer to move, and there’s less chance of damage. Remember to bag up screws and tape them to the item. - Add Padding Where Needed
Shrink wrap is not a cushion. Stick moving blankets or old towels on spots that might get dinged, like corners or glass. The wrap will keep the padding in place. - Start Wrapping Tightly, Not Recklessly
Kick things off by anchoring the end under a leg or edge so it won’t unravel. Then, circle the piece evenly, overlapping each pass by about half the width of the wrap. Don’t pull too hard on corners—plastic can rip, and sharp corners can poke through. - Seal and Label
Once it’s fully wrapped, cut the wrap neatly and press it down—it sticks to itself, so you don’t need tape. Label bulky or covered items with a Sharpie or tape if you want to avoid the guessing game later.
Here’s a quick snap-shot of some average supplies you’re likely to use for a typical job:
| Furniture Type | Shrink Wrap Needed (ft) | Recommended Padding | Avg. Time to Wrap |
|---|---|---|---|
| Three-Seater Couch | 100-120 | Blanket on corners, arms | 8-12 minutes |
| Dining Table | 80-110 | Towels between legs and surface | 10-15 minutes |
| Dresser | 50-70 | Blanket across drawers | 6-9 minutes |
If you mess up, don’t worry—just unroll and start again. This process works whether you’re storing your stuff in a public storage unit or just out in the garage. Clean, protected, and ready to go whenever you need it back.
Tips for Different Furniture Types
Not every piece of furniture handles shrink wrap the same way. If you get the process right, you'll save yourself heartache and money. Let's break down the must-knows for the main types you’re storing.
Sofas and Cushioned Seats: Before wrapping, vacuum those cushions! Any crumbs or hair left on them now will stick around for months, maybe even attract pests. If your sofa’s leather, skip using shrink wrap directly on the surface. Leather needs to breathe, or it can crack and stick. A cotton sheet or moving blanket underneath is the trick here. According to the American Moving & Storage Association, “For delicate upholstery or leather, always add a protective layer before shrink wrapping to prevent sweat or condensation damage.”
- Remove legs and loose cushions when possible.
- Wrap the base tightly, but don’t over-stretch the wrap—cushion foam gets misshapen easily.
Wooden Furniture: Wood really hates moisture, and shrink wrap can actually trap condensation in, causing warping. Always put a soft sheet or blanket between the wood and the wrap. For antique or finished surfaces, this is doubly important. No shortcuts here—one forgotten area and you get a cloudy finish or sticky spots that break your heart when unwrapped.
- Wrap the entire piece, focusing on corners and vulnerable edges.
- For fragile carvings, use extra padding before you start the wrap.
Glass Tables & Shelves: Glass is fragile—one bump and you’re sweeping up a mess. Cardboard is your best friend here. Wrap the glass in bubble wrap, then put a piece of cardboard over it before shrink wrapping.
- For glass, double up on the layers. There’s no such thing as too much caution.
- Use packing tape to hold cardboard and wrap in place, not directly on the glass.
Mattresses: Mattresses are like sponges for dust and odors. A specialty mattress bag is best, but shrink wrap works in a pinch. Just know that once wrapped, mattresses can’t breathe, so don’t store them for more than a few months this way, or you risk mildew.
- Stand mattresses up on their side, but keep them flat if stored for long.
- Label the plastic with a marker so you know which side was up—helps keep shape.
“Wrappings done wrong are a call for disaster. Always think layers and barriers, especially for wood and fabric, to make sure your things come out of storage looking and smelling fresh.” — Home Storage Solutions, 2024
Here’s a quick breakdown to keep things clear:
| Furniture Type | Protection Layer Needed? | Shrink Wrap Directly? | Special Tip |
|---|---|---|---|
| Sofa (Fabric) | Optional | Yes | Vacuum before wrapping |
| Sofa (Leather) | Yes, blanket/sheet | No | Prevents moisture damage |
| Wood Table | Yes, sheet/blanket | No | Stops condensation |
| Glass Top | Yes, cardboard/bubble wrap | No | Extra padding for safety |
| Mattress | Optional | Yes | Short-term storage only |
Following these smart moves for each type keeps your shrink wrap job tight and worry-free.

Things to Avoid and Extra Hacks
It’s easy to mess up shrink wrapping if you rush it or skip the prep. First big no-no: never wrap furniture that’s damp or dirty. Any moisture hiding inside your couch cushions or table legs can turn into mold or mildew once it’s sealed in, and you’ll open up your storage months later to a nasty surprise. Give everything a once-over with a dry cloth and let it air out before even touching that roll of plastic.
Don’t shrink wrap directly onto leather or finished wood. The plastic can trap humidity and leave marks, or in the worst cases, peel off the finish. Slip on a cotton or breathable sheet first, then start wrapping. This simple layer makes all the difference.
Avoid wrapping too tight, especially on soft surfaces. You want the wrap to hold things in place but not squish padding or leave dents. On the flip side, don’t leave it so loose that dust can sneak in from the ends.
Now, some easy hacks to level up your wrapping game:
- If you’re storing a couch, slip old socks or tennis balls on the legs before shrink wrapping to keep them from poking through the plastic.
- Label large wrapped items with a sticky note under the plastic so you don’t have to unwrap it just to figure out what’s inside.
- Stack chairs by wrapping them in pairs—seat to seat. You save space and it’s easier to carry.
- For long-term storage, toss a few moisture absorber packs inside before fully closing up the wrap. This helps keep everything dry, especially in humid climates.
- Always use heavy-duty wrap or “industrial” shrink wrap, not the kind you find in the kitchen. You want strength against tears and better protection while moving or storing.
These little details do a lot of heavy lifting. With the right prep, tools, and habits, your shrink wrap job will keep your furniture safe, clean, and frustration-free when it’s time for the big reveal.